Damp Proofing
Services
OUR DAMP PROOFING SERVICES
Our damp proofing services are based on the British board of accreditation and will control and prevent the amount of moisture that enters your walls and floor, preventing them from passing into internal spaces. This service is frequently required in most modern residential constructions, but can be used to protect older structures as well.
We assess and survey using an electrical moisture meter to determine the cause and extent of damp occuring and provide you with a professional recommendation of how to treat the damp in Johannesburg and Pretoria, Gauteng.


TYPES OF DAMP PROOFING
A- CAUSES OF RISING DAMP
These Walls are damp due to moisture rising by capillary action through the defective Damp Proof Course layer between the foundation and the walls above (rising damp) or below D.P.C line at split-levels (lateral damp).
This Moisture carries natural salts and lime from the earth, which crystallize in the form of salt deposits on the wall faces (white powder). As you are aware, the listed areas are already showing evidence of deterioration by the collapse of plaster and decorative materials.
Unless this migration of moisture is halted by installation of new chemical Damp Proof Course, further deterioration will become inevitable, resulting in severe structural damage to the plaster, mortar joints and the bricks themselves. Further a health hazard can exist in that the dampness creates high humidity.
B- TREATMENT OF RISING DAMP
Damp plaster in all affected areas would be removed to height damp has risen. By Drilling 3 holes per brick-10mm dia – 90mm depth an injecting a silicone resin, which cures in contact with water, into the brickwork immediately above floor level, the path of moisture migration will be dissected by an impermeable layer resisting any further capillary action.
This system is approved by leading waterproofing companies both here and abroad, and has been successful carried out for years on industrial and domestic buildings, and is guaranteed
C- PROCESS OF DAMP REMOVAL
EXTERNAL WALL
- Remove Skirtings
- Strip off all damaged plaster to heights indicated by number enclosed in a circle- 0,5.
- Drill 3 Holes per Brick.
- Silicone inject inner and outer bricks at floor level.
- Damp stops at floor level- first brick D.P.C. line.
- Re-plaster
- Upper damp wall dries out through hydrative salt retardant Plaster coating. – View Diagram A3 For Rising Damp External
INTERNAL WALL
- Silicone inject one side only at floor level.
- Damp stops at first brick (floor level).
- Re-plaster using a salt retardant cement mixture. – View Diagram A1 For Rising Damp Internal
CAUSES OF RISING DAMP IN EXPOSED PLINTH
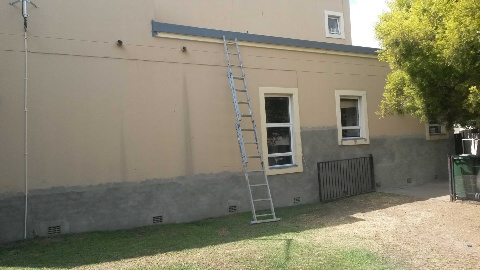
The foundation plinth being of standard stock brick construction is absorbing moisture from the earth and this damp in turn is damaging the plaster coating below the horizontal damp prooof course situated at internal floor level, this is evident by puffy abd crumbling plaster externally.
The damp proof course at floor level stops the damp from rising, therefore the problem can be contained by hydrative waterproofing treatment in the areas from outer ground level up to +- 100mm above the damp proof course line situated at floor level externally.
TREATMENT OF RISING DAMP IN EXPOSED PLINTH
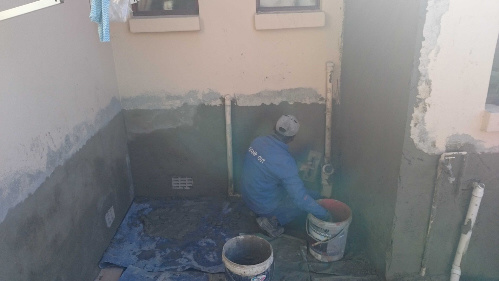
All plaster is to be removed from ground level up to +- 100mm or height damp has risen above inside floor level to all outer walls around house base. Trance damp floor course line and “V” cut to expose horizontal damp proof course at floor level externally, two-stage waterproof exposed brickwork (tanking).
TWO STAGE WATERPROOFING
First Stage– Expose brick plinth to be chemically waterproofed.
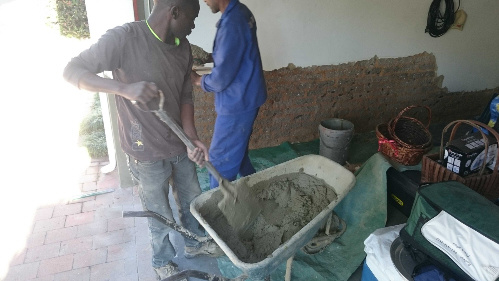
Second Stage– Replaster with a waterproof additive mixed into plaster.
All above treatment is hydrative, therefore an exterior P.V.A is suggested as a decorative coating to allow adequate hydration to problem walls.
PROCESS OF LATERAL DAMP REMOVAL IN EXPOSED PLINTH- EXTERNAL
- Dig away soil/ grass down to +-100mm
- Strip all plaster ground level up to min. 1 brick.
- “V” cut to expose D.P.C at floor level. If no D.P.C found – drill an inject to provide new chemical D.P.C to halt rising damp.
- Neutralize salts.
- Tank seal exposed plinth.
- Re-plaster using hydrative moisture resistant plastet to match existing finish. – View Diagram B2 For Lateral Damp Enternal
Another treatment used in conjunction with lateral damp treatment to remove damp from exposed plinth is:
DEHYDRATION PORTS WITH AIRBRICK COVERS
We also install dehydration ports where moisture is trapped within the sub slab soil of a structure to allow ventilation. This is done by cutting 200m X 200mm hole through the base of a plinth at 2-3m intervals, tunelling in +-1m and covering the holes with the installation of concrete air bricks. – View Diagram E For Dehydration Ports With Airbrick Covers
1. CAUSES OF LATERAL DAMP OCCURRING AT SPLIT LEVEL
This damp is moving laterally from under the higher floor slab fill into the brick work and onto the plastered surface, between the two floors (Split Level), the Damp Proof Course at higher floor level stops the damp from rising, therefore the problem can be contained by hydrative waterproofing and tanking the split level, inject if no D.P.C is found. – View Diagram C1 For Lateral Damp Occuring at Split Level
2. TREATMENT OF LATERAL DAMP- INTERNAL
All Plaster is to be removed from ground level up to +- 100 mm, or height damp has risen above inside floor level to all outer walls around unit base. Trace Damp proof course line and “V” cut to expose horizontal Damp Proof Course at floor level externally. Drill 3 holes per brick and silicone inject first brick above floor level only where no D.P.C is found on main buildings. – View Diagram C For Lateral Damp Internal
TWO STAGE WATERPROOFING
First Stage– Exposed brick plinth to be chemically waterproofed. (Tanking- cementuous waterproof compound).
Second Stage– Re-plaster with a salt retardant additive mixed into plaster.
